
Whether you’re building a to-do app, a product catalogue, or any application that requires displaying a collection of items, React makes it easy to create and manage lists efficiently. In this blog post, we’ll explore how to create a list in React, step by step.
Prerequisites
Before diving into creating a list in React, it’s assumed that you have a basic understanding of JavaScript, JSX syntax, and React concepts such as components and state management. If you’re new to React, I recommend checking out the official React documentation.
Setting up the React project
To create a React project, you can use tools like Create React App or set up your build configuration. Once your project is set up, you’re ready to create a list component.
Creating the List Component
In React, components are the building blocks of the UI. Let’s start by creating a functional component for our list. Here’s an example of a basic list component structure:
import React from 'react';

const ListComponent = () => {
  return (
    <div>
      {/* List content goes here */}
    </div>
  );
};

export default ListComponent;
Defining the List Data
To display lists in React, we need data to populate it. In React, we typically use state or props to store and manage data. For the sake of simplicity, let’s use local state to define the list data. Add the following code inside your ListComponent:
import React, { useState } from 'react';

const ListComponent = () => {
  const [listData, setListData] = useState([
    'Item 1',
    'Item 2',
    'Item 3',
    /* Add more items as needed */
  ]);

  return (
    <div>
      {/* List content goes here */}
    </div>
  );
};

export default ListComponent;
Rendering the List Items
To render the list items dynamically, we can use the map() method to iterate over the listData array and generate the corresponding list elements. Update your ListComponent as follows:
import React, { useState } from 'react';

const ListComponent = () => {
  const [listData, setListData] = useState([
    'Item 1',
    'Item 2',
    'Item 3',
    /* Add more items as needed */
  ]);

  return (
    <div>
      {listData.map((item, index) => (
        <div key={index}>{item}</div>
      ))}
    </div>
  );
};

export default ListComponent;

This is the output from the above code. It is just a list of 3 lines of text. But something is missing here, it looks like this isn’t a list but just three lines of text. Let’s go back and change the div to a list item li inside the map function and change the outer div to an unordered list ul.
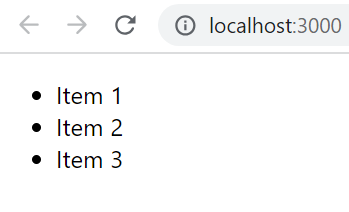

It now looks more like the expected list of an HTML page.
You may have noticed the use of the key prop in the list above. React needs this key to identify each unique item in the list. React will use this data during the reconciliation process to determine any changes to the data in the list and how/when to re-render the component. You can learn more about this here.
Styling the List
At this point, you have a working list in React. However, you might want to style it to match your application’s design. You can add CSS classes or inline styles to customize the appearance of the list items. One other option is to use MUI Core to style the list.
Manipulating the List
To create a more interactive list, you might want to add functionality to add, delete, or update items. React’s state management system allows you to handle these operations efficiently. For example, you can add a form to add new items or implement a delete button for each list item.
Conclusion
In this blog post, we’ve shown how to create lists in React. We covered the steps from setting up a React project to rendering a dynamic list using state and mapping over an array of data. Remember, this is just a starting point, and you can extend the functionality of your list component based on your application’s requirements. React’s flexibility and reusability make it an excellent choice for building lists and managing data-driven UIs. Happy coding!
Don’t forget to check out my other articles on React here